
Threejs 地图3D可视化
可以直接去github github.com/1023byte/3Dmap
前言
threejs小练习,从头实现如何加载地理数据,并将其映射到三维场景中的对象上。
获取数据
在开始绘制图形前,需要一份包含地理信息数据,我们可以从阿里云提供的小工具获取datav.aliyun.com/portal/school/atlas/area_selector
在范围选择器中,可以选择整个或者各个省份的地理信息数据。
生成图形
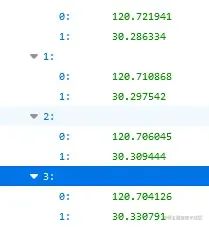
获取数据后,先分析一下JSON的结构
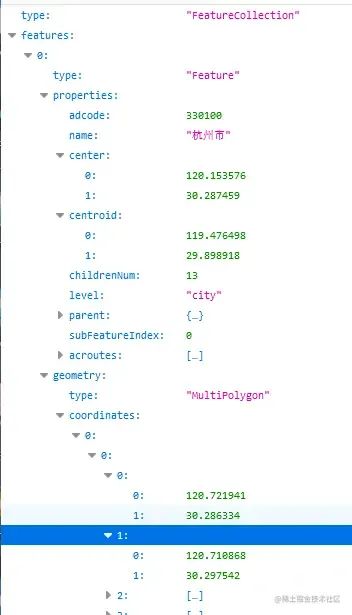
properties 中包含了名字、中心、质心等信息, geometry.coordinates 则是地理的坐标点,我们需要做的是将这些点连成线。
THREE.Shpae
const createMap = (data) => {
const map = new THREE.Object3D();
data.features.forEach((feature) => {
const unit = new THREE.Object3D();
const { coordinates, type } = feature.geometry;
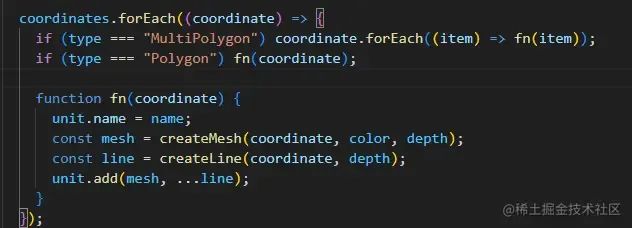
coordinates.forEach((coordinate) => {
if (type === "MultiPolygon") coordinate.forEach((item) => fn(item));
if (type === "Polygon") fn(coordinate);
function fn(coordinate) {
const mesh = createMesh(coordinate);
unit.add(mesh);
}
});
map.add(unit);
});
return map;
};
这里需要注意在geometry中的type分为MultiPolygon和Polygon,需要分别处理,不然会造成个别区域缺失,二者区别是MultiPolygon的坐标多一层嵌套数据,所以这里多做一次遍历。
const createMesh = (data, color, depth) => {
  const shape = new THREE.Shape();
  data.forEach((item, idx) => {
    cosnt [x,y] =item
    if (idx === 0) shape.moveTo(x, -y);
    else shape.lineTo(x, -y);
  });

  const shapeGeometry = new THREE.ShapeGeometry(shape);
  const shapematerial = new THREE.MeshStandardMaterial({
    color: 0xfff,
    side: THREE.DoubleSide
  });

  const mesh = new THREE.Mesh(shapeGeometry, shapematerial);
  return mesh;
};
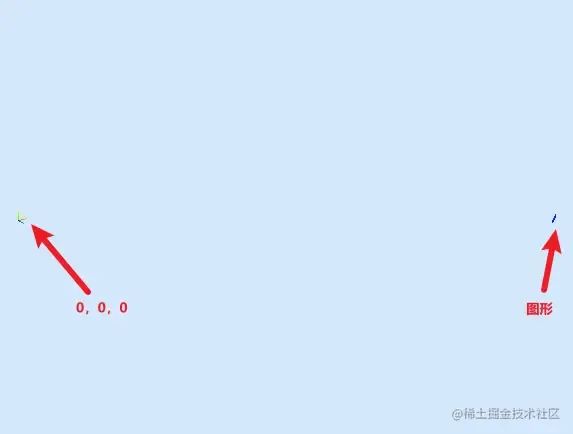
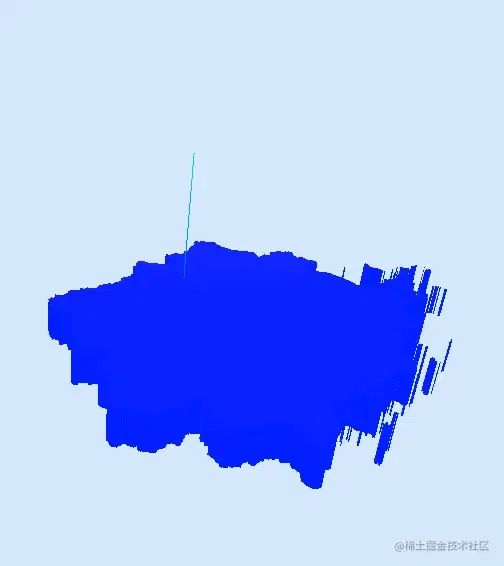
通过THREE.Shape绘制一个二维的形状平面后,但是打开网页后会发现页面中并没有出现图形,这是因为是json中的坐标非常大,在缩小后才能勉强看到,所以我们需要对坐标进行相应的处理。
坐标矫正1
这里先介绍第一种矫正的方法
import * as d3 from "d3";
...
const offsetXY = d3.geoMercator();
在createMap中新增获取第一个子数据的centroid以及偏移代码,这里的centroid也就是杭州的质心。

d3.geoMercator()是一个地理投影函数,用于将地球表面的经纬度坐标映射到二维平面上。
在代码中,.center(center)是用于指定投影的中心点,这个中心点决定了投影的中心位置,地图上的所有要素都将以该点为中心进行投影转换。
.translate([0, 0])是指定投影的平移量。这里的 [0, 0] 表示在平面坐标系中的 x 和 y 方向上都没有平移,也就是将地图的投影结果放置在平面坐标系的原点位置。
这份数据是浙江省的地理信息,所以根据以上代码,图形的中心点已经以到杭州的质心上,并且坐标为[0,0]
THREE.ExtrudeGeometry
接着再通过 THREE.ExtrudeGeometry将shape从二维挤出成三维。为了方便查看刚才代码使用了new THREE.ShapeGeometry(shape);我们替换成ExtrudeGeometry
  const shapeGeometry = new THREE.ExtrudeGeometry(shape, {
    depth: 1,
    bevelEnabled: false,
  });
depth:图形挤出的深度,默认值为1
bevelEnabled:对挤出的形状应用是否斜角,默认值为true
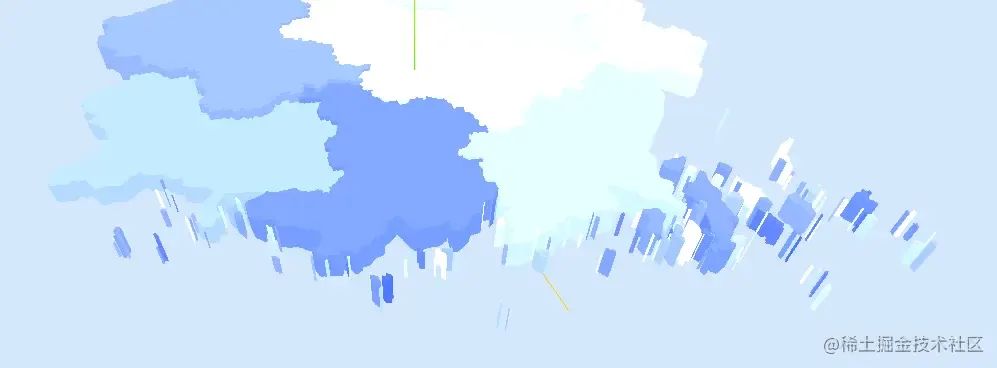
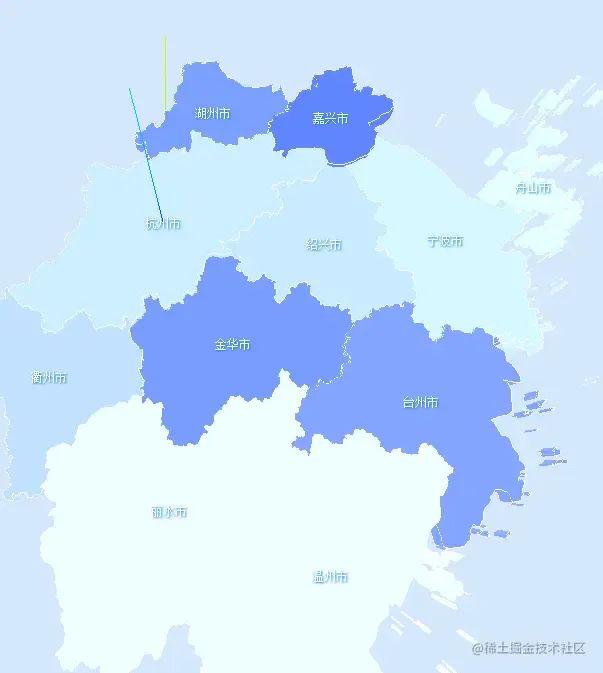
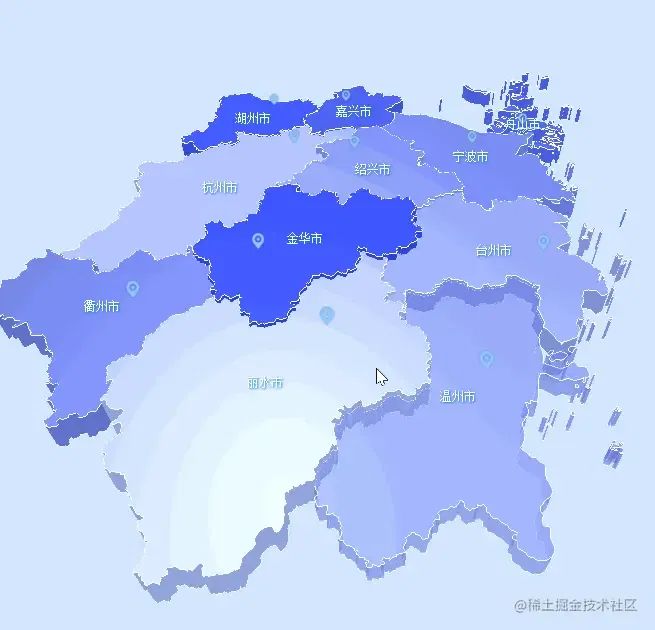
区域划分
现在的图形全都是一个颜色,看不出区域
    const color = new THREE.Color(`hsl(
      ${233},
      ${Math.random() * 30 + 55}%,
      ${Math.random() * 30 + 55}%)`).getHex();
    const depth = Math.random() * 0.3 + 0.3;
    ...
    ...
    const mesh = createMesh(coordinate, color, depth);
我们写一个随机颜色和随机的深度,在data.features中写入,确保每一个子区域一个颜色,如果在createMesh中实现会产生以下区别,舟山、宁波、温州的岛屿会产生不同的颜色。

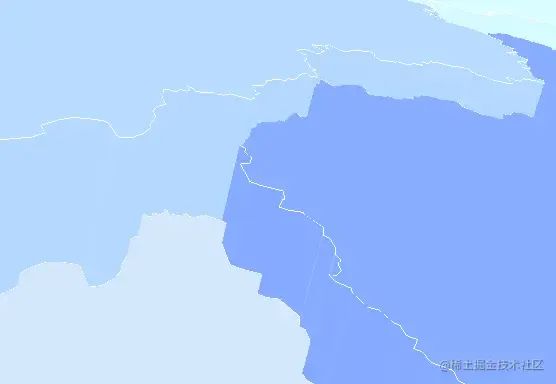
绘制描边
绘制描边的方法和之前的shape有所不同
创建一个THREE.BufferGeometry对象,并通过一组给定的点来设置其几何形状,再通过LineBasicMaterial材质渲染基本的线条
const createLine = (data, depth) => {
  const points = [];
  data.forEach((item) => {
    const [x, y] = offsetXY(item);
    points.push(new THREE.Vector3(x, -y, 0));
  });
  const lineGeometry = new THREE.BufferGeometry().setFromPoints(points);
  const uplineMaterial = new THREE.LineBasicMaterial({ color: 0xffffff });
  const downlineMaterial = new THREE.LineBasicMaterial({ color: 0xffffff });

  const upLine = new THREE.Line(lineGeometry, uplineMaterial);
  const downLine = new THREE.Line(lineGeometry, downlineMaterial);
  downLine.position.z = -0.0001;
  upLine.position.z = depth + 0.0001;
  return [upLine, downLine];
};
绘制标签信息
接下来我们通过css2d的方式向图形中添加城市名称
使用css2d需要相应的引用以及设置
import {
  CSS2DRenderer,
  CSS2DObject,
} from "three/examples/jsm/renderers/CSS2DRenderer.js";
    ...
    ...
  const labelRenderer = new CSS2DRenderer();
  labelRenderer.domElement.style.position = "absolute";
  labelRenderer.domElement.style.top = "0px";
  labelRenderer.domElement.style.pointerEvents = "none";
  labelRenderer.setSize(window.innerWidth, window.innerHeight);
  document.getElementById("map").appendChild(labelRenderer.domElement);
除了能使用css的样式,通过new CSS2DObject() 这一步后可以操作threejs元素一样操作div,其实原理是仍是使用transform属性进行3d变换操作。
const createLabel = (name, point, depth) => {
  const div = document.createElement("div");
  div.style.color = "#fff";
  div.style.fontSize = "12px";
  div.style.textShadow = "1px 1px 2px #047cd6";
  div.textContent = name;
  const label = new CSS2DObject(div);
  label.scale.set(0.01, 0.01, 0.01);
  const [x, y] = offsetXY(point);
  label.position.set(x, -y, depth);
  return label;
};
绘制图标
绘制图标也可以使用css2d的方式,但是除了css2d,我们还有多种方式:css3d,svg,Sprite。这里我们使用Sprite。
const createIcon = (point, depth) => {
  const url = new URL("../assets/icon.png", import.meta.url).href;
  const map = new THREE.TextureLoader().load(url);
  const material = new THREE.SpriteMaterial({
    map: map,
    transparent: true,
  });
  const sprite = new THREE.Sprite(material);
  const [x, y] = offsetXY(point);
  sprite.scale.set(0.3, 0.3, 0.3);

  sprite.position.set(x, -y, depth + 0.2);
  sprite.renderOrder = 1;

  return sprite;
};
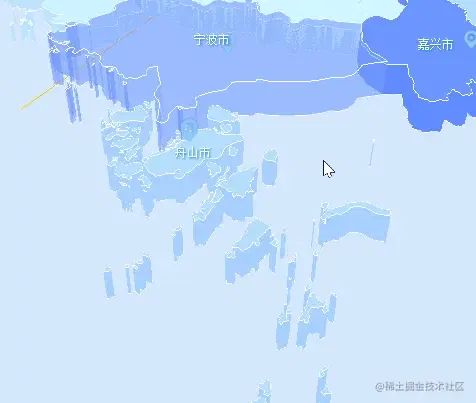
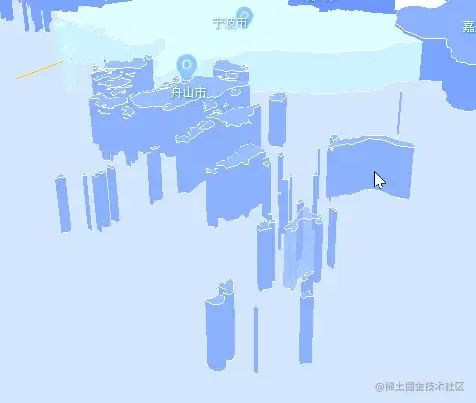
SPrite是一个总是面朝着摄像机的平面,这一点似乎和css2d的效果一样,不过二者还略有不同。
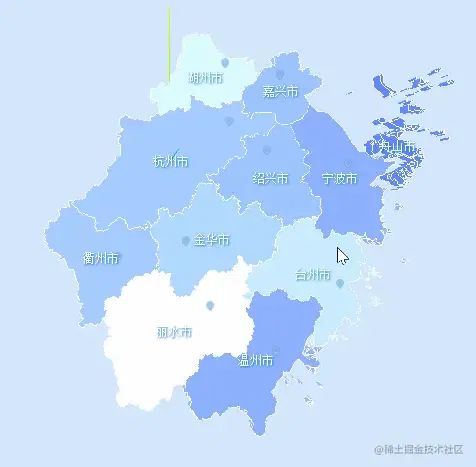
图中我们可以看到,SPrite会随着相机的距离而改变大小。
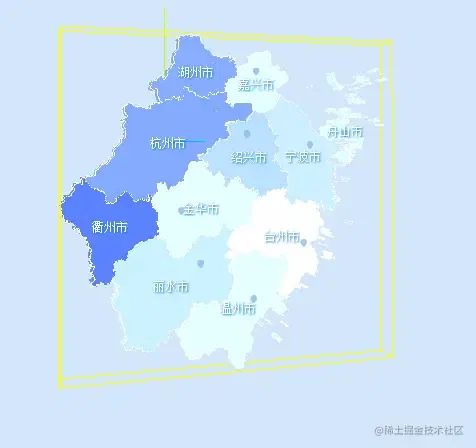
坐标矫正2
之前的坐标矫正我们可以将中心移到某个点上,那如果想把中心移到整个图形的中心该如何实现?通过已有的数据我们只能将中心移到某个区域的中心或者质心,并不知道图形的中心在哪里,当然我们可以手动调试,不过换一份地理数据又的重新调试。
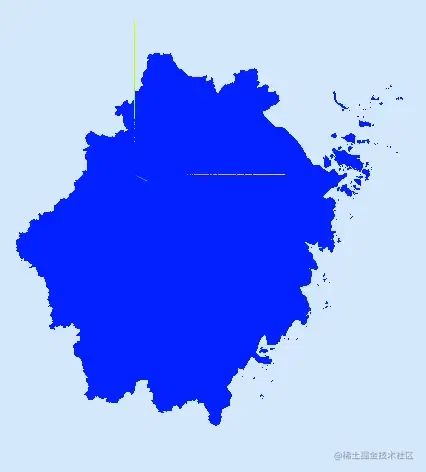
对此,我们可以使用threejs中的包围盒
const box = new THREE.Box3().setFromObject(map);
const boxHelper = new THREE.Box3Helper(box, 0xffff00);
scene.add(boxHelper);
创建一个Box3对象,并通过调用setFromObject(map)方法,将map的包围盒信息存储在box变量中。,box变量现在包含了map对象的边界范围。为了便于观察再加一个辅助器。
接着通过const center = box.getCenter(new THREE.Vector3());获取包围盒的中心点坐标。
  map.position.x = map.position.x - center.x ;
  map.position.y = map.position.y - center.y ;
对中心点进行计算后便是一个相对中心的位置,因为有的地形涉及岛屿海域或者形状不太规整,得出的中心点可能不是理想效果。
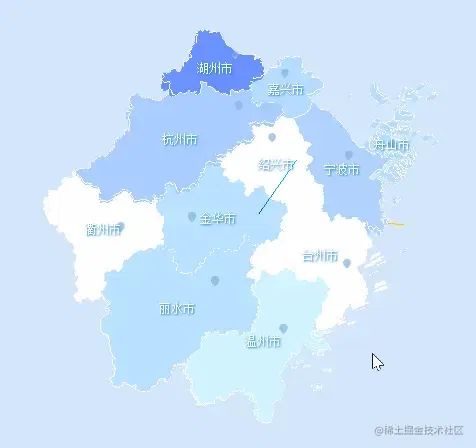
鼠标交互
最后我们来实现图形与鼠标的交互, THREE.Raycaster可以从指定的原点(起点)沿着指定的方向(射线)发射一条射线。这条射线可以与场景中的对象进行相交检测,以确定射线是否与对象相交,从而获取与射线相交的对象或交点信息,常用于用户交互、拾取物体、碰撞检测等场景。
const mouse = new THREE.Vector2();

//将鼠标位置归一化为设备坐标。x 和 y 方向的取值范围是 (-1 to +1)
mouse.x = (event.clientX / window.innerWidth) * 2 - 1;
mouse.y = -(event.clientY / window.innerHeight) * 2 + 1;

const raycaster = new THREE.Raycaster();

// 通过摄像机和鼠标位置更新射线
raycaster.setFromCamera(mouse, camera);

// 计算物体和射线的焦点
const intersects = raycaster.intersectObjects(map.children)
通过以上代码我们可以在intersects里获取到鼠标都触发了哪些对象。
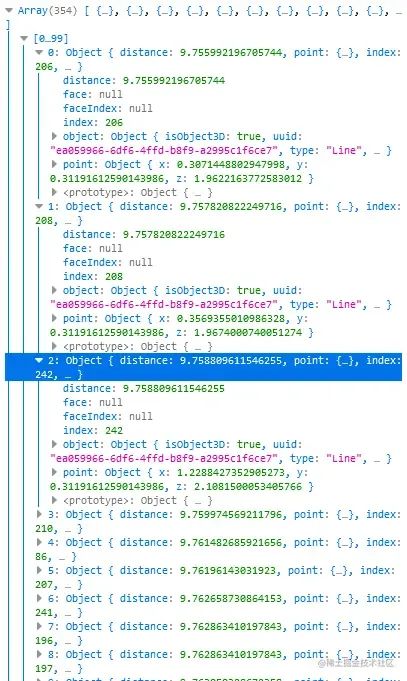
可以看到我们触发很多对象,但是大部分type都是Line,也就是之前绘制的描边,这些线段会干扰到正常的点击,所以我们要将它过滤掉。
const intersects = raycaster
  .intersectObjects(map.children)
  .filter((item) => item.object.type !== "Line");
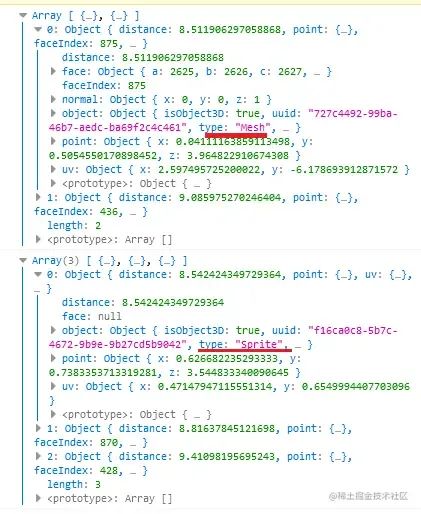
这里简单处理一下,点击Mesh使其透明,点击Sprite打印对象。
        if (intersects.length > 0) {
          if (intersects[0].object.type === "Mesh") {
            if (intersect) isAplha(intersect, 1);
            intersect = intersects[0].object.parent;
            isAplha(intersect, 0.4);
          }
          if (intersects[0].object.type === "Sprite") {
            console.log(intersects[0].object);
          }
        } else {
          if (intersect) isAplha(intersect, 1);
        }
        function isAplha(intersect, opacity) {
          intersect.children.forEach((item) => {
            if (item.type === "Mesh") {
              item.material.opacity = opacity;
            }
          });
        }
有一点需要注意在获取Mesh对象时,我们使用的是intersects[0].object.parent;,拿到了触发对象的的父级对象。以舟山为例,我们点击了其中一个岛屿,但是想要整个区域都发生变化,所以需要获取父级对象再遍历处理。
其他设置
大致的功能都实现完成了,我们还可以在视觉上增加一些风格。
  const ambientLight = new THREE.AmbientLight(0xd4e7fd, 4);
  scene.add(ambientLight);
  const directionalLight = new THREE.DirectionalLight(0xe8eaeb, 0.2);
  directionalLight.position.set(0, 10, 5);
  const directionalLight2 = directionalLight.clone();
  directionalLight2.position.set(0, 10, -5);
  const directionalLight3 = directionalLight.clone();
  directionalLight3.position.set(5, 10, 0);
  const directionalLight4 = directionalLight.clone();
  directionalLight4.position.set(-5, 10, 0);
  scene.add(directionalLight);
  scene.add(directionalLight2);
  scene.add(directionalLight3);
  scene.add(directionalLight4);

  ...
  ...

  THREE.MeshStandardMaterial({
    color: color,
    emissive: 0x000000,
    roughness: 0.45,
    metalness: 0.8,
    transparent: true,
    side: THREE.DoubleSide,
  });
配合灯光以及MeshStandardMaterial材质实现反光效果。
结尾
代码写的有些匆忙,功能也还有没写的,本来是打算加上飞线、热力、柱状图这类的功能。但是最近刚入手了《现代JavaScript库开发:原理、技术与实战》,想着到时候读完看看能不能试着写一个相关的库,给自己画个大饼先
假如有后续的话可以前往github.com/1023byte/3Dmap
关于本文
作者:Defineee
https://juejin.cn/post/7247027696822304827