
手把手教你写vue插件并发布(一)
vue的插件开发
这篇文章较长,需要一定的阅读时间。这里有一份改善版本的插件笔记,在一个项目下完成开发、测试、发布的全过程。https://www.cnblogs.com/adouwt/p/9655594.html
–2019年1月15日更新。
反映问题:
执行 npm publish 报错,因为有些同学本地设置了 淘宝的npm 镜像源,npm 包发布到这个镜像源就有问题了,最简单的方式是 :发布时候指定地址
npm publish -registry=https://registry.npmjs.org/
–2019年4月3号更新
1.本地开发
1.1 初始化本地开发项目
我们采用vue-cli,初始化一个vue 项目。这个不做详解,请移步到 这里 https://www.cnblogs.com/anxiaoyu/p/7071143.html,查看具体详细。初始化后就是这样的项目结构:

其他的文件目录不是本节内容重点,不做详解,请移步这里查看 https://blog.csdn.net/tanzhenyan/article/details/78871610。
1.2 test.js 的内容 ,这是插件的入口文件
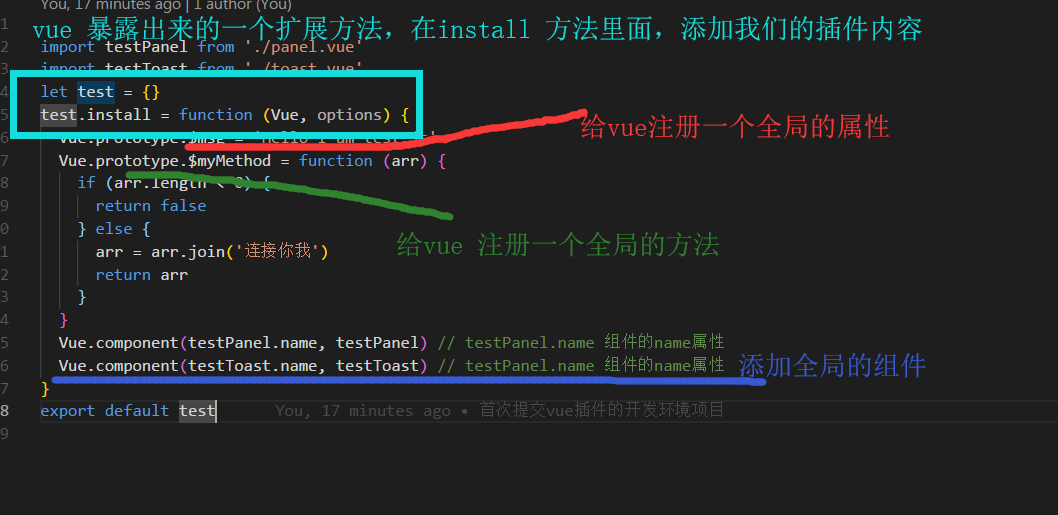
关于为什么需要在install这个方法这里添加我们的方法,可以参考官网。https://cn.vuejs.org/v2/guide/plugins.html 这里只是用了其中的一部分的内容。
test.js的代码如下:
import testPanel from './panel.vue'
import testToast from './toast.vue'
let test = {}
test.install = function (Vue, options) {
  Vue.prototype.$msg = 'Hello I am test.js'
  Vue.prototype.$myMethod = function (arr) {
    if (arr.length ) {
      return false
    } else {
      arr = arr.join('连接你我')
      return arr
    }
  }
  Vue.component(testPanel.name, testPanel) // testPanel.name 组件的name属性
  Vue.component(testToast.name, testToast) // testPanel.name 组件的name属性
}
export default test
test.js 里面引入的两个vue 文件,这两个文件就是我们需要开发的组件样式。
panel.vue
<template>
  <div>
    <div class="number-panel">
      <p v-show="checkedNumber.length>0" class="number-show">{{checkedNumber}}</p>
      <p v-show="!checkedNumber" class="number-show">  </p>
      <ul>
        <li @click="clickThisNumber($event)" v-for="index in 9" :key="index">{{index}}</li>
        <li @click="clickThisNumber($event)">0</li>
      </ul>
    </div>
  </div>
</template>

<script>
export default {
  name: 'test-panel',   // 这里需要注意下,我们是采用的全局注入我们的组件,所以在后面因为我们的组件后,会直接使用这个命名的标签
  data () {
    return {
      checkedNumber: ''
    }
  },
  components: {
  },
  methods: {
    clickThisNumber (e) {
      this.checkedNumber = this.checkedNumber.concat(e.currentTarget.innerHTML)
    }
  }
}
</script>

<style>
  .number-show {
    height: 20px;
  }
  .number-panel ul {
    padding: 0;
  }
  .number-panel ul li{
    display: inline-block;
    width: 28%;
    height: 50px;
    line-height: 50px;
    margin-top: 20px;
    background: #ddd;
    border-radius: 8px;
    margin-right: 10px;
  }
  .number-panel ul li input {
    display: none;
  }
</style>
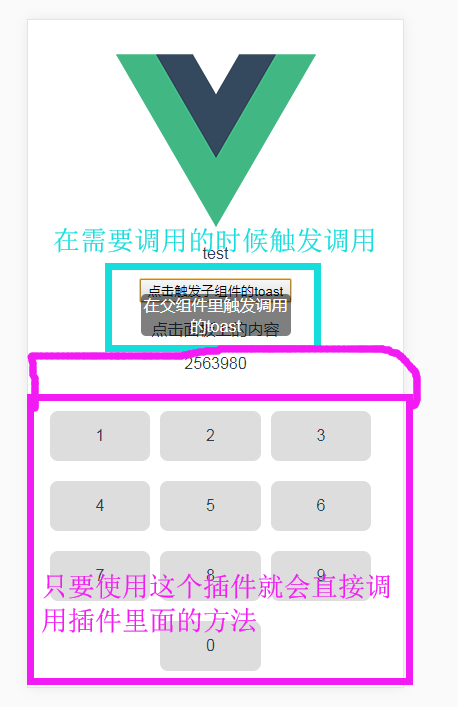
实现的效果如下:
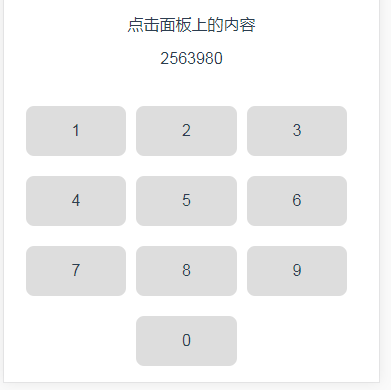
点击面板上的数字,及时展现在上面,具体的样式不做详解,逻辑很简单。
toast.vue
<template>
  <div>
    <div class="toast"  ref='toastPosition' :class="{active: toastHidden}">
      <div class="toast-warpper">
         {{text}}
      </div>
    </div>
  </div>
</template>

<script>
export default {
  name: 'test-toast',
  data () {
    return {
      text: '',
      toastHidden: false
    }
  },
  created () {
    // this.toastPlugin()
  },
  components: {
  },
  methods: {
    toastPlugin (msg, time) {
      this.text = msg
      this.toastHidden = true
      setTimeout(() => {
        this.toastHidden = false
      }, time)
    }
  }
}
</script>

<style>
  .toast {
    position: absolute;
    left: 50%;
    top: 50%;
    transform: translate(-50%, -50%);
    width: 0px;
    min-height: 0px;
    text-align: center;
    background: rgba(0, 0, 0, 0.5);
    border-radius: 5px;
    color: #fff;
    transition: all 0.5s;
    z-index: -1;
    opacity: 0;
  }
  .toast.active {
    width: 150px;
    min-height: 25px;
    opacity: 1;
    z-index: 11;
  }
</style>
效果如下:
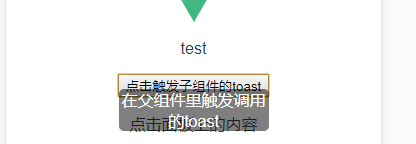
这里模拟的是,调用该插件的toast 方法。
2.本地测试
我们上面就直接给出了我们要完成的内容,但是怎么确定我们这个写的样式或者方法可以用呢? 所以需要测试下,我们到底写的是个什么鬼。
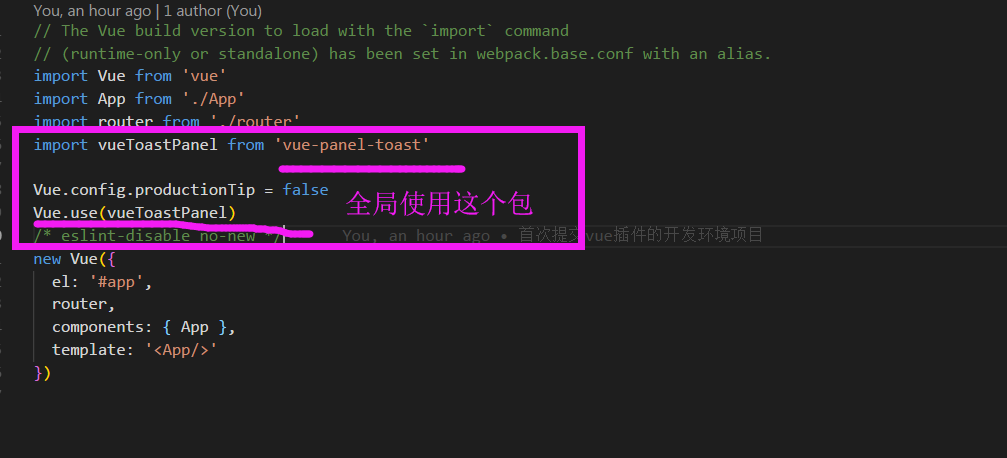
main.js 全局import

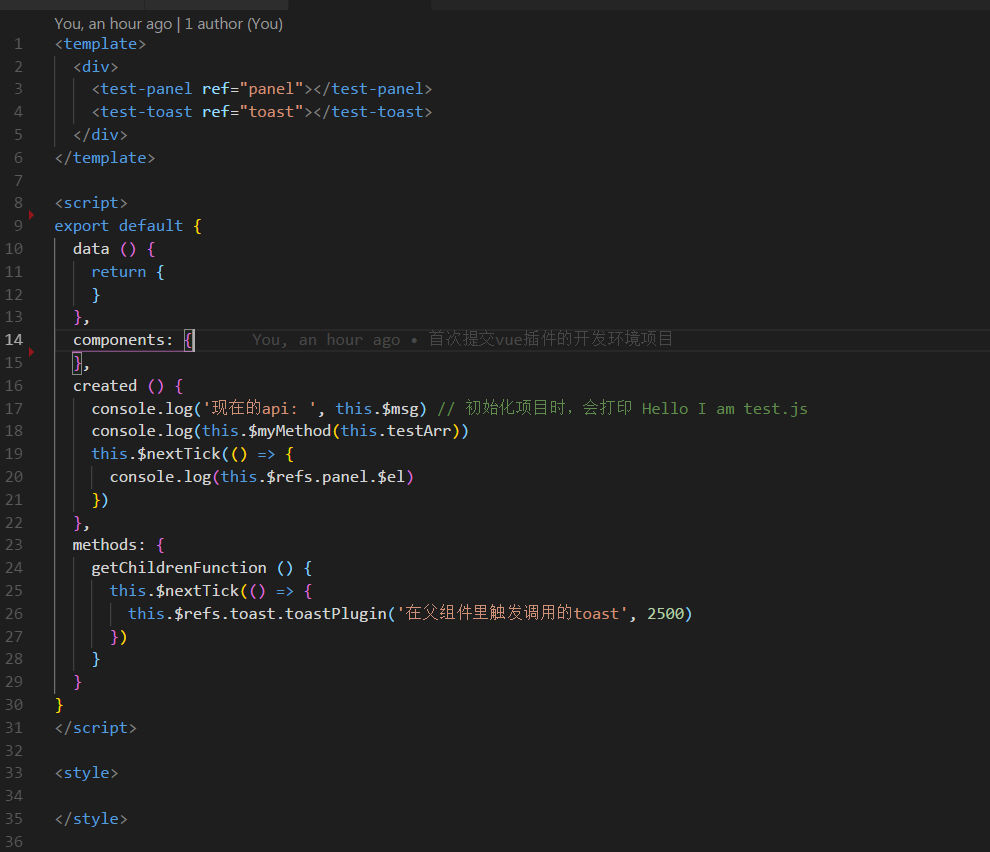
具体页面使用我们的插件:
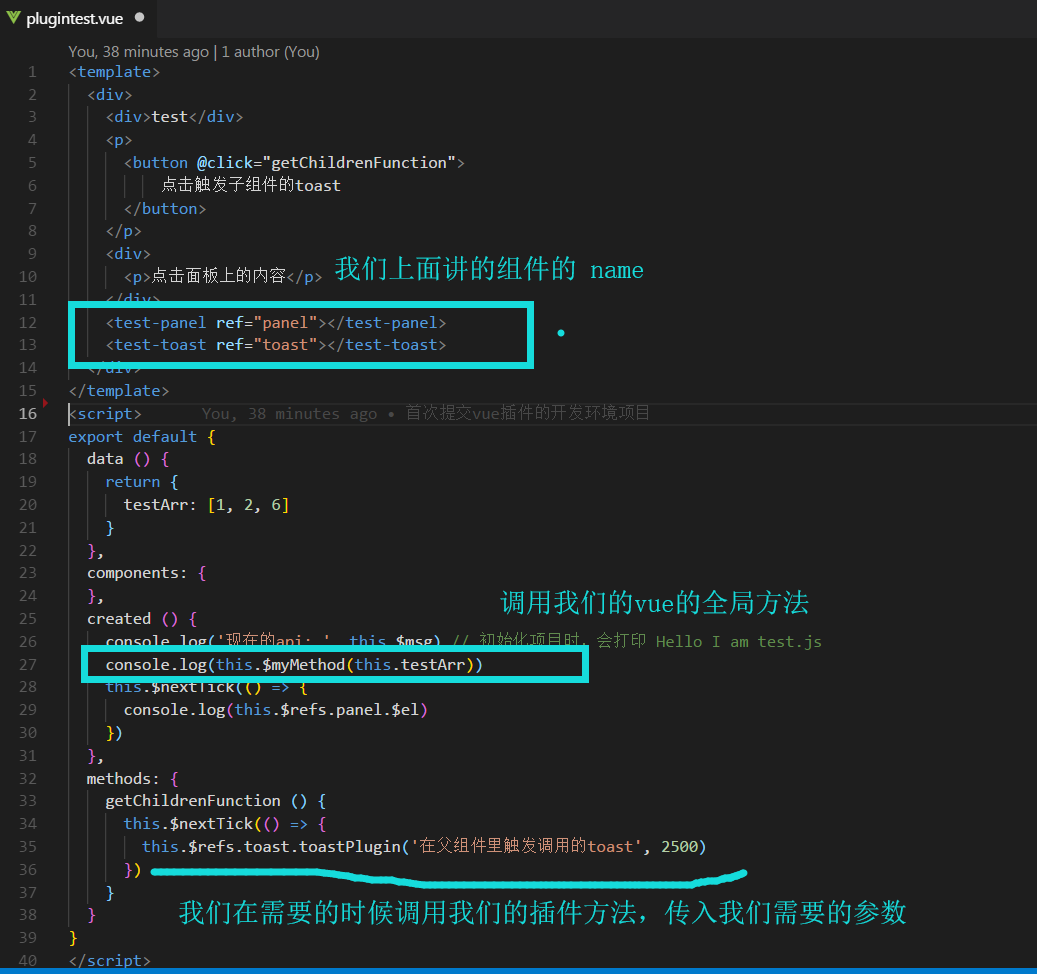
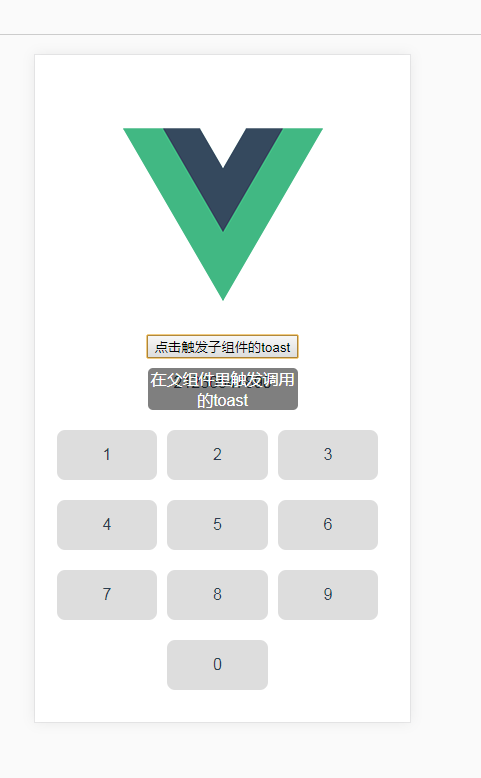
两个效果如下:
3.打包到npm
测试完成,可以实现我们的想要的内容。下面我们就要把我们的内容打包发布到npm 上去。
为了不和开发的项目环境发生冲突,我们采用另外一个项目,专门做打包发布的。
工具:
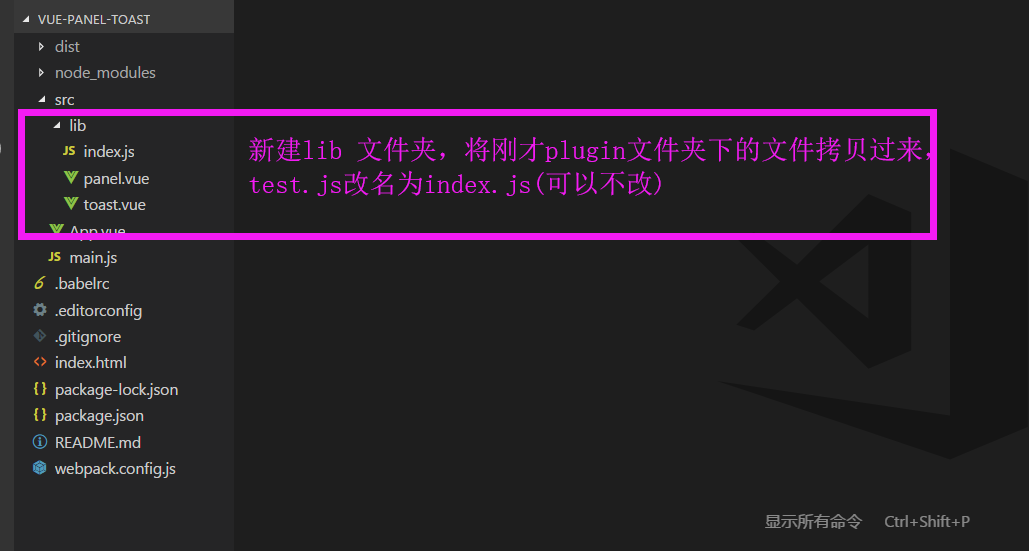
webpack-simple 这个简化版的webpack。 初始化项目,点击这里, https://www.cnblogs.com/majj/p/9054471.html。删掉我们不需要的文件夹,新建一个我们要放置我们开发代码,完成如下:
修改webpack.config.js的打包名称
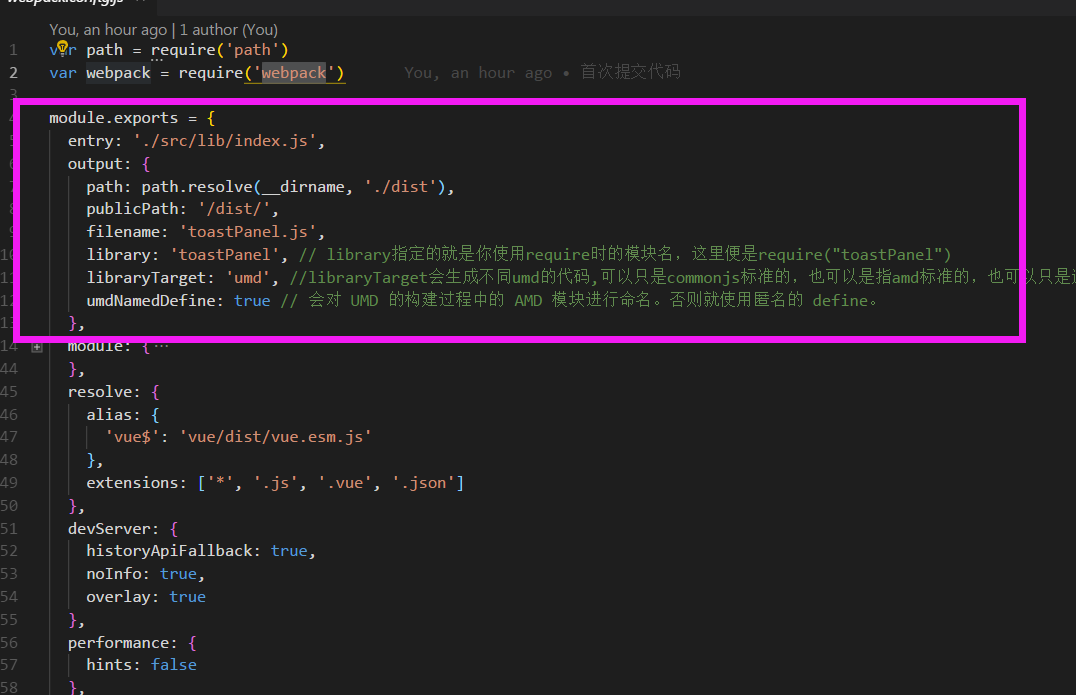
代码如下:
var path = require('path')
var webpack = require('webpack')

module.exports = {
  entry: './src/lib/index.js',
  output: {
    path: path.resolve(__dirname, './dist'),
    publicPath: '/dist/',
    filename: 'toastPanel.js',
    library: 'toastPanel', // library指定的就是你使用require时的模块名,这里便是require("toastPanel")
    libraryTarget: 'umd', //libraryTarget会生成不同umd的代码,可以只是commonjs标准的,也可以是指amd标准的,也可以只是通过script标签引入的。
    umdNamedDefine: true // 会对 UMD 的构建过程中的 AMD 模块进行命名。否则就使用匿名的 define。
  },
  module: {
    rules: [
      {
        test: /.css$/,
        use: [
          'vue-style-loader',
          'css-loader'
        ],
      },      {
        test: /.vue$/,
        loader: 'vue-loader',
        options: {
          loaders: {
          }
          // other vue-loader options go here
        }
      },
      {
        test: /.js$/,
        loader: 'babel-loader',
        exclude: /node_modules/
      },
      {
        test: /.(png|jpg|gif|svg)$/,
        loader: 'file-loader',
        options: {
          name: '[name].[ext]?[hash]'
        }
      }
    ]
  },
  resolve: {
    alias: {
      'vue$': 'vue/dist/vue.esm.js'
    },
    extensions: ['*', '.js', '.vue', '.json']
  },
  devServer: {
    historyApiFallback: true,
    noInfo: true,
    overlay: true
  },
  performance: {
    hints: false
  },
  devtool: '#eval-source-map'
}

if (process.env.NODE_ENV === 'production') {
  module.exports.devtool = '#source-map'
  // http://vue-loader.vuejs.org/en/workflow/production.html
  module.exports.plugins = (module.exports.plugins || []).concat([
    new webpack.DefinePlugin({
      'process.env': {
        NODE_ENV: '"production"'
      }
    }),
    new webpack.optimize.UglifyJsPlugin({
      sourceMap: true,
      compress: {
        warnings: false
      }
    }),
    new webpack.LoaderOptionsPlugin({
      minimize: true
    })
  ])
}
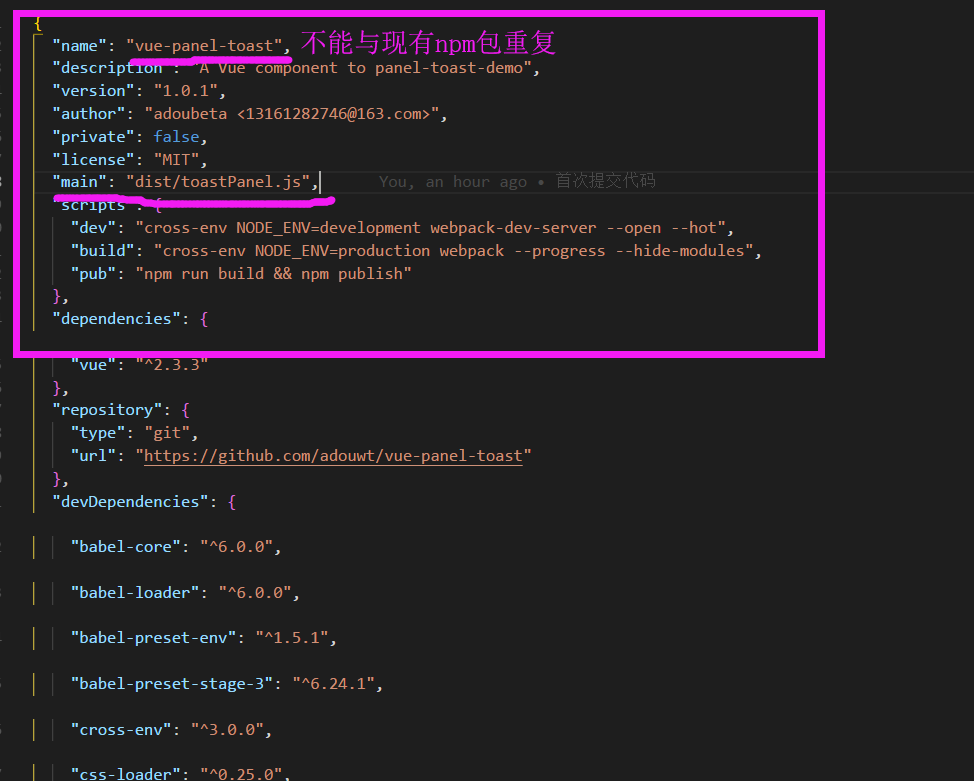
打包的项目清单配置文件:
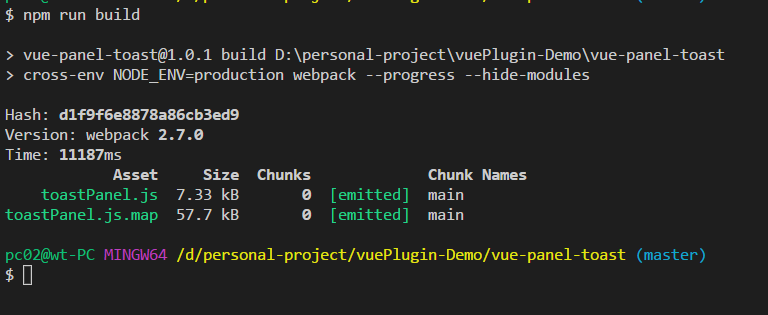
执行 npm run build 打包
发布到npm:
注册npm 不做详解,请看这里,https://cnodejs.org/topic/5823c4411120be9438b02a31 ,核心操作就这么几步骤,一做就会

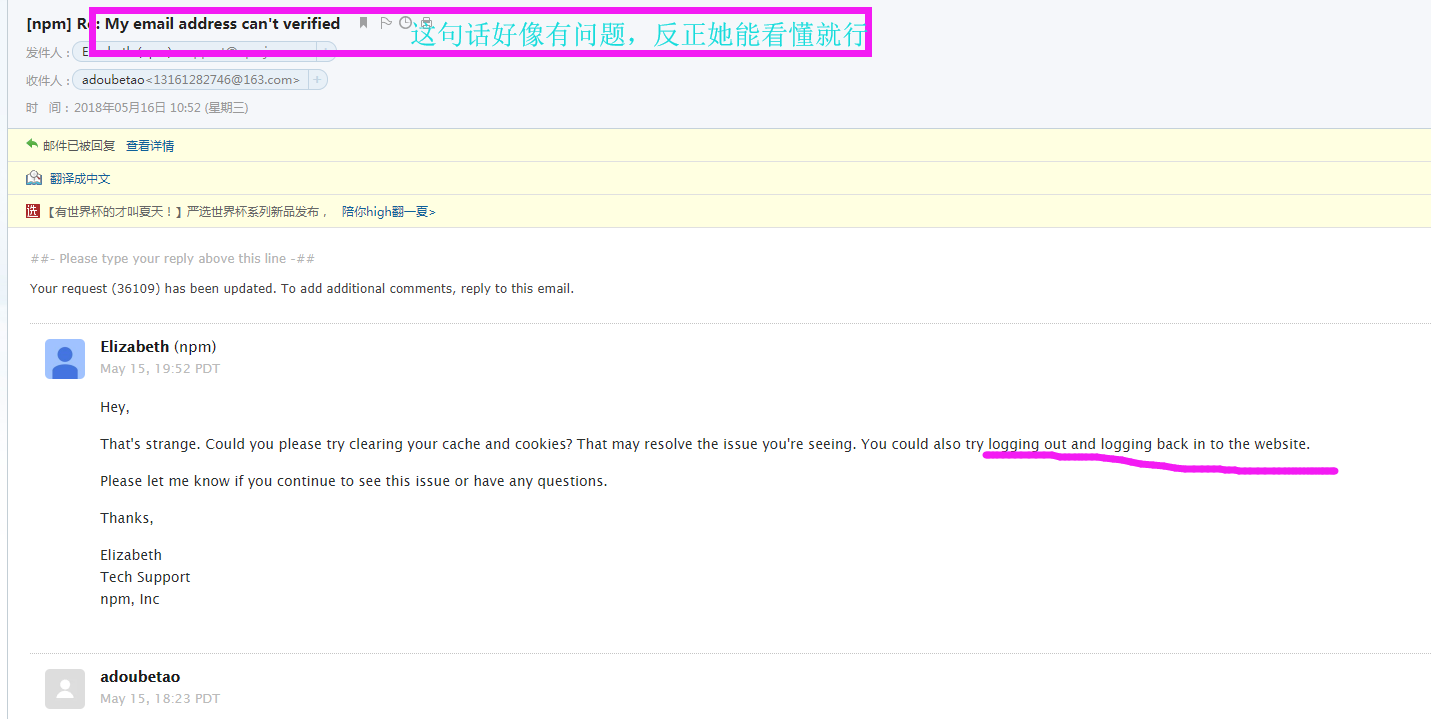
(插一句:注册账户我遇到一个坑,注册完后,npm官网的小姐姐会让你验证邮箱,验证完成后,需要退出登录重新登录,不然会一直提示你要验证邮箱),蹩脚的邮件交流如下,请忽略细节,仔细看划线位置。
查看当前环境下的用户:
npm whoami

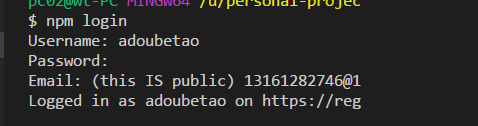
登录:
npm login
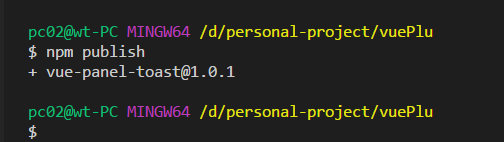
发布:
npm publish
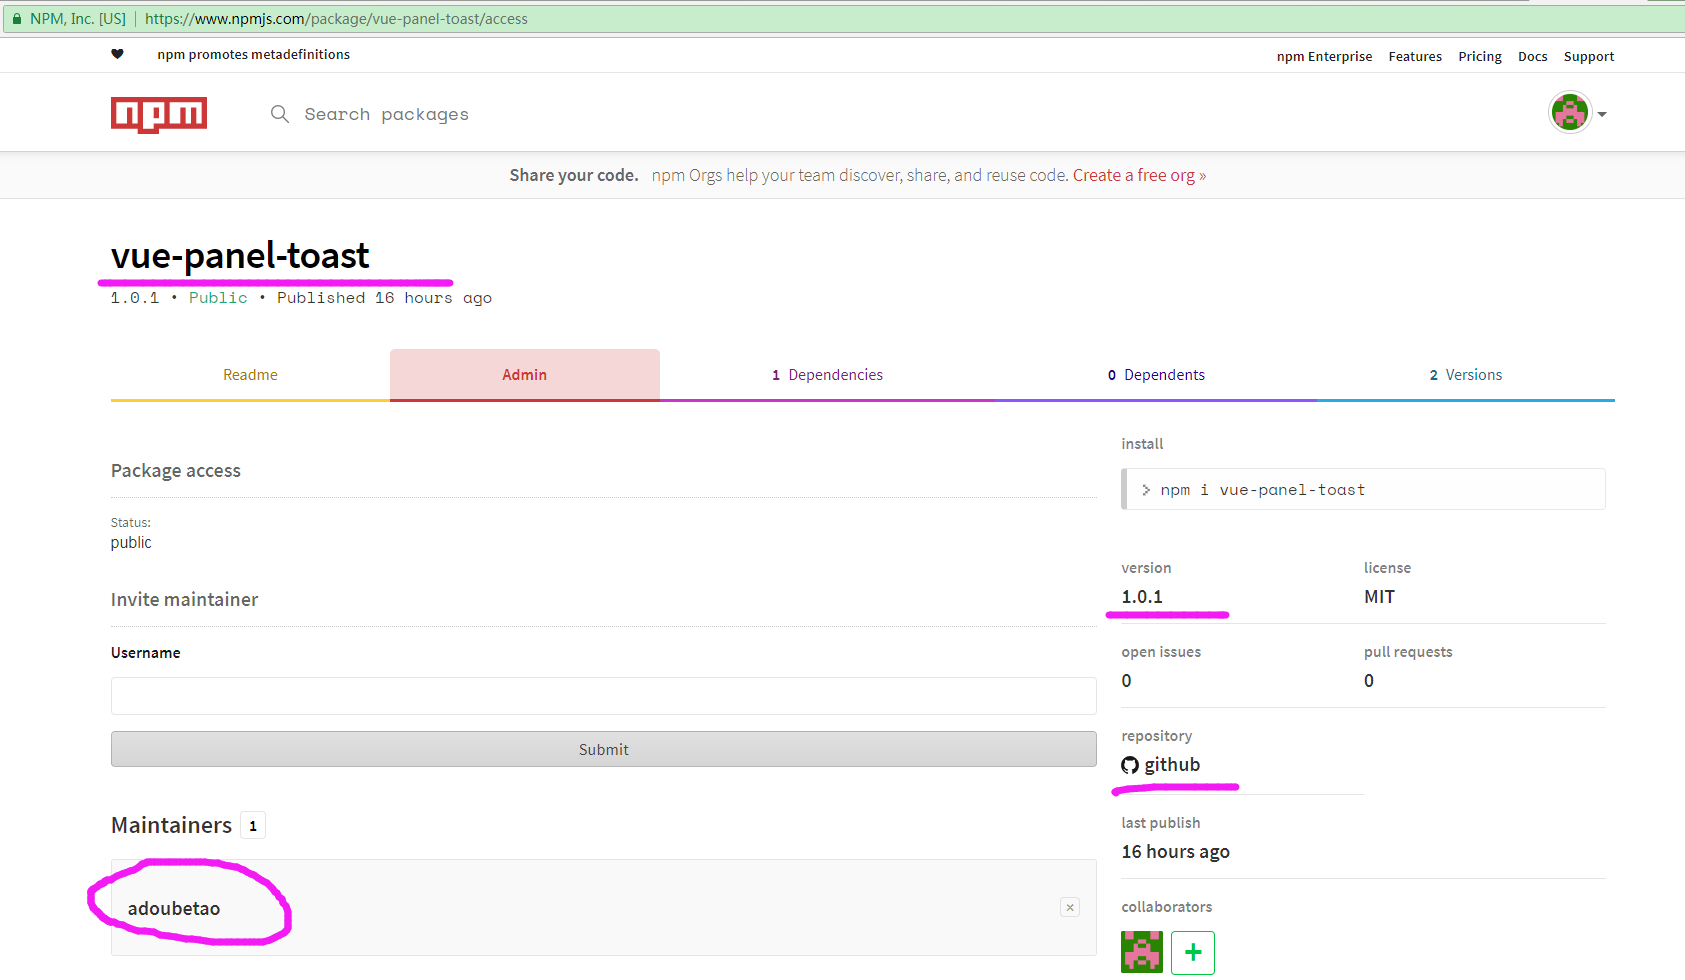
我们顺便看看,npm 官网是不是有我们的刚才发布的内容,https://www.npmjs.com/package/vue-panel-toast
4.安装使用
安装:
npm install vue-panel-toast –save
使用:
main.js 全局引入
具体页面使用:
效果如下:
开发测试到发布流程OK,样式和具体的业务效果需要在调试,总算是流程跑通,具体开发出什么样的普惠众生的插件或者UI组件,就看各位小哥哥小姐姐的拳脚啦。
已经完成的下一篇的文章是开发和发布的任务都集合在一个项目文件下,欢迎查看:https://www.cnblogs.com/adouwt/p/9655594.html
下个目标:
这个是全局使用,下次改进到 页面单独使用插件,目前是按需引入使用报错。
如果有错误之处,敬请指出。
文章来源于互联网:手把手教你写vue插件并发布(一)